Drawing is a creative journey, and holding a pencil effectively is one of the foundational skills of basic drawing that every aspiring artist should master. The way you hold your pencil can greatly influence the precision, control, and style of your freehand drawings. In this detailed guide, we will explore various pencil-holding techniques, discuss the pros and cons of each method, offer practical tips for choosing the right grip, and provide additional insights to help you enhance your freehand drawing skills.
Holding a Pencil for Freehand Drawing: An In-Depth Guide
Keyword: how to hold a pencil for freehand drawing
The Importance of Pencil Grip
Before we dive into the specific techniques, let’s understand why the way you hold your pencil matters in learning to draw a freehand drawing:
- Control and Precision: A proper grip allows you to have precise control over the pencil’s movements, resulting in accurate lines and details in your drawings.
- Comfort: Holding the pencil correctly can reduce hand fatigue and discomfort during long drawing sessions, allowing you to focus on your art.
- Versatility: Different grips offer varying degrees of flexibility and stability, enabling you to adapt to different drawing styles and techniques.
Five Ways to Hold a Pencil for Freehand Drawing
1. Standard Tripod Grip
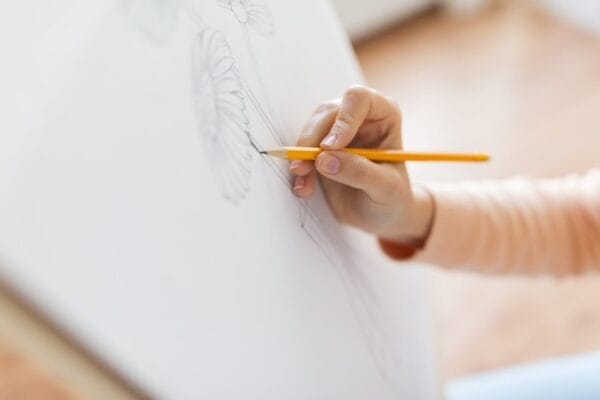
The tripod grip is the fundamental pencil-holding technique that forms the basis of many drawing styles. Here’s how to master it:
- Hold the pencil shaft between your thumb and index finger, creating a triangular shape.
- Rest the pencil on your middle finger for additional support.
- Maintain a relaxed grip, ensuring that you don’t squeeze the pencil too tightly.
- Position the tip of the pencil at a 45-degree angle to the paper, providing optimal control and precision.
The standard tripod grip is ideal for detailed and precise sketches, making it a valuable skill to develop drawing techniques as an artist.
2. Overhand Grip
The overhand grip offers a unique ability for drawing freehand and is particularly useful for loose sketches and shading. Here’s how to use this grip effectively:
- Hold the pencil above the lead end with all three fingers (thumb, index, and middle finger).
- Position the pencil between your thumb and index finger.
- Extend your middle finger to support the pencil from below.
- Keep your grip relaxed to allow for fluid and swift movements.
Using the overhand grip provides stability and precision, especially when drawing straight from observation. It enables you to create finer details in your sketches and is favored by artists for its versatility in the drawing process.
3. Underhand Grip
The underhand grip challenges the conventional way of holding a pencil by placing the pencil below where you would typically position your middle finger. This grip emphasizes arm movement over finger control, making it suitable for creating bold lines and gestures. Follow these steps to use the underhand grip effectively:
- Hold the pencil with your palm facing up and your fingers gripping the pencil from below.
- Adjust your finger positions and pressure to find a comfortable grip.
- Use light pressure while drawing or writing to prevent strain on your hand and maintain control.
The underhand grip offers an alternative approach to freehand drawing, allowing you to experiment with different angles and create dynamic lines and shapes with ease. It makes a huge difference in gesture drawing where you use your whole arm to make drawing motions.
4. Extended Tripod Grip
The extended tripod grip is a variation of the traditional tripod grip, which provides enhanced stability and control. To use this grip effectively, follow these steps:
- Start with the standard tripod grip, where the pencil rests on the pad of the thumb, index, and middle finger.
- Extend your ring and pinky fingers slightly outwards to create a wider base of support.
- Experiment with different angles and positions to find the most comfortable and effective grip for your drawing style.
The extended tripod grip is particularly beneficial when sketching or drawing at various angles, allowing for greater precision and control in your artwork.
5. Extended Thumb Grip
The extended thumb grip introduces a different dimension to pencil-holding by extending your thumb toward the pencil’s tip. This grip encourages shoulder rotation and larger hand movements, making it ideal for creating bold and expressive strokes in your drawings.
These five pencil-holding methods are not set in stone; instead, they offer a range of options for you to explore and adapt based on your personal preferences and artistic objectives. As you experiment with each grip, you’ll gain a deeper understanding of which one suits your style and projects best.
Pros and Cons of Each Method
Each pencil-holding method has its own set of advantages and limitations. Understanding these can help you make informed choices when approaching different drawing tasks:
Standard Tripod Grip
-
Pros:
- Excellent control and precision.
- Ideal for detailed and intricate sketches.
- Provides stability for fine lines and delicate work.
-
Cons:
- May lead to hand fatigue during extended drawing sessions.
Overhand Grip
-
Pros:
- Offers stability and precision for detailed work.
- Suitable for creating fine details and shading.
-
Cons:
- Not the best choice for bold, gestural strokes.
Underhand Grip
-
Pros:
- Allows for bold lines and dynamic gestures.
- Ideal for larger drawings and expressive strokes.
-
Cons:
- Less precise compared to other grips.
- May require more practice to achieve control.
Extended Tripod Grip
-
Pros:
- Enhanced stability and control, especially at different angles.
- Well-suited for detailed work that requires precision.
-
Cons:
- Slightly less versatile than the standard tripod grip.
Extended Thumb Grip
-
Pros:
- Enables bold strokes and expressive marks.
- Ideal for creating dynamic and impactful artwork.
-
Cons:
- Less suitable for fine details and intricate work.
Tips for Choosing the Right Grip
Selecting the appropriate pencil grip is a matter of personal preference and the specific demands of your artwork. Here are some tips to help you make the right choice:
-
Experiment: Don’t hesitate to experiment with different grips. Try them out on simple lines and shapes, gradually increasing complexity as you become more comfortable.
-
Adapt to Your Subject Matter: Different drawing projects may benefit from various grips. Consider the requirements of your subject matter and adjust your grip accordingly.
-
Explore Angles: Experimenting with different angles can yield unique shading effects and perspectives in your drawings. Tilted angles can create subtle shading, while vertical angles can result in precise lines.
-
Consider Charcoal: While graphite pencils are versatile, experimenting with charcoal can introduce tones and textures not achievable with traditional pencils. Charcoal allows you to make expressive marks and add depth to your artwork.
-
Mix and Modify: Many artists don’t limit themselves to a single grip. Some alternate between grips depending on the project or the desired effect. Ray Smith’s “The Artist’s Handbook” suggests experimenting with hand positions and pressures as a means to achieve creative breakthroughs.

