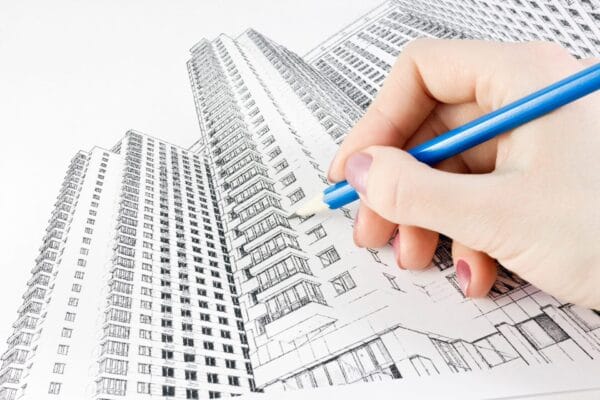
Drawing of a new apartment house made by a hand using a pencil

The Illusion of Depth: A Guide to Perspective Drawing

[rt_reading_time label="Reading Time:" postfix="minutes" postfix_singular="minute"]

This Guide to Perspective Drawing overviews fundamental principles, gives some practical tips and techniques, and guides you through the most common perspective systems. Learning perspective drawing is essential for animators, illustrators, comic book artists, game artists, or any serious artist looking to improve their drawings.

 What’s in this Guide?

Learning to draw in perspective need not be a complex, technical topic.

The basics of linear perspective are easy to understand. The information presented here is intended to answer the most common questions and whet the artist’s appetite for more in-depth instruction.

Books, videos, and other recommended resources for further study are listed at the end of this post. Whether you are a beginner or an experienced artist, this article will help you enhance your drawing skills and create realistic and captivating artwork. Let’s dive in!

What is Perspective Drawing?

Learning perspective drawing is essential to becoming an illustrator, animator, or interior designer.
One-point perspective grid lines converge on a single vanishing point.

Perspective drawing refers to the illusion of depth and three-dimensionality created on a two-dimensional surface. It mimics how objects appear to the eye based on their spatial position and distance from the viewer. Perspective relies on techniques that make objects seem life-like on paper. Mastering perspective is key for artists seeking to make their artwork convincing and visually engaging.

The Role of Perspective in Creating Believable Drawings

One of the most important aspects of representational art is the ability to convey depth and dimension. This is particularly true in drawings, where artists rely solely on lines and shading to bring their subjects to life. Understanding perspective can greatly enhance your drawings and make them more realistic and captivating.

Understanding Point Perspective

The illusion of point perspective revolves around vanishing points. A vanishing point is a point on the horizon where parallel straight lines appear to meet. The key element gives the illusion of depth in a drawing.

By strategically placing vanishing points, you can determine the direction and angle of lines in your drawing, creating the illusion of depth and space. And by placing objects along these lines, you can create a sense of distance and space in your artwork. Orthogonal lines, also known as perspective lines, are the lines that extend from the vanishing points.

These lines guide the placement of objects and determine their size and position in the drawing. They direct the eye toward the vanishing points, creating a sense of depth and distance.

Perspective Drawing – Teach Yourself to Draw

The Basic Attributes of Perspective Drawing

All perspective drawings share some common terms and visual elements. Among them are:

  • Horizon Line: The horizon line represents the eye level of the viewer. It’s a horizontal line that defines the most distant perceived plane. Objects below the horizon are closest to the viewer.
  • Vanishing Points: These are imaginary points on the horizon line where parallel lines converge. All perspective lines lead to at least one vanishing point, creating depth.
  • Orthogonal: Orthogonal lines are parallel lines that recede into the distance. Their convergence creates the illusion of depth and space.
  • Foreshortening: Foreshortening describes the visual effect of an object appearing shorter than its actual dimensions due to the angle and distance from the viewer’s line of sight.


Learn how to create depth in your drawings and take your artwork to the next level

Perspective systems serve a singular purpose, aiding in accurately portraying your subject within a believable space. However, using perspective does not automatically improve the quality of your ideas or compose the picture for you.

Before choosing a perspective system, it is essential to establish a rough composition. Skipping brainstorming and creating multiple rough drafts can lead to elaborating on weak concepts and compositions.

This issue can be avoided by adhering to the proper sequence of preliminary actions. With this in mind, let us now delve into some insights about the creative process. Accurate perspective drawing transforms a sketch into a visually convincing artwork that mimics our perception of space and dimension.

The success of the illusion requires refining the informal decisions made during the sketching stage and imbuing them with credibility. Embrace sketching as a tool for exploration and problem-solving, allowing your unique vision to shine through in every composition.

Through careful attention to proper perspective, your drawings will captivate viewers by imitating how we perceive the world. Sketching is the playground for creative ideas. Precise perspective drawings are the finished product. Your design choices while sketching will determine if your final drawing succeeds and has the intended impact.

How to Draw Perspective: 1, 2, & 3 Point Perspective Explained

Perspective is how we draw something as if looking at it through a window and tracing our drawing directly on the glass.  This technique, which represents objects in the distance smaller than those in the foreground, closely mirrors our perception of objects in space as seen by the modern Western observer.

Perspective for Beginners

We are culturally conditioned to accept the illusion as representing depth and three-dimensionality on two-dimensional drawing paper or other surfaces. We can use abstract vanishing points, horizon lines, and converging orthogonal lines that meet at the vanishing point to depict objects in space.

When used properly, these techniques add realism, dynamism, and a sense of depth to your artwork, making it visually appealing and captivating to the viewer.

One-Point Perspective

One-point perspective is the simplest form of drawing in perspective. It is a fundamental technique that creates the illusion of objects in space seen from a frontal viewpoint. In one-point perspective, receding lines parallel to each other in real life point to a single vanishing point on the horizon line.

An example of one point perspective
An example of one-point perspective drawing (courtesy of mammothmemory.net)

One-point perspective is commonly used to create the illusion of depth in architectural drawings or landscapes. The horizon line is a horizontal line representing the viewer’s eye level. It separates the sky from the ground or any other division in your drawing. Placing the horizon line at different heights in the composition can change the viewer’s perception of the scene from a ” worm’ s-eye” to a “bird’ s-eye” view.

Setting Up Your Drawing

To begin a drawing in one-point perspective, follow these steps:

1. Define the Horizon Line: Determine the position and height of your horizon line. Depending on the desired composition and perspective, you can place it in the center, upper third, or lower third of your drawing.

2. Locate the Vanishing Point: Choose the position of your vanishing point on the horizon line. This vanishing point will be the center towards which all the lines in your drawing will pass through.

3. Draw Orthogonal Lines: Draw lines that extend from the vanishing point to the edges of your drawing using a ruler. These lines will guide placing objects and determining their sizes and positions.

Drawing Objects in One-Point Perspective

Once you have set up the perspective grid, you can start drawing objects within the one-point perspective framework. Here are some tips to keep in mind:

1. Start with Simple Shapes: Draw simple geometric shapes within the perspective grid, such as cubes or rectangular prisms. This will help you understand how the vanishing point determines the lines and makes objects appear three-dimensional.

2. Connect the Corners: Use the orthogonal lines to connect the corners of your shapes and create the illusion of depth. These lines should be either parallel to each other or point towards the vanishing point.

3. Add Details and Refine: Once you have the basic structure of your object, you can start adding details and refining the shapes. Pay attention to the perspective lines and ensure that they remain consistent throughout the drawing.

Gradually develop your skills in one-point perspective drawing by practicing and experimenting with various objects and compositions. Observe real-life scenes and objects to understand perspective.


A Two-Point Perspective Drawing
An example of a two-point perspective drawing (from Adobe Stock Images)

Two-Point Perspective

Two-point perspective is another widely used technique in perspective drawing. It allows you to draw objects or scenes from an angled view, creating a sense of depth and space. In two-point perspective, there are two vanishing points on the horizon line, each representing the convergence of lines from different directions.

How to Draw Interior Two Point Perspective

This technique is often used to draw objects at an angle to the viewer, such as buildings or street scenes. By aligning the lines of the objects with the vanishing points, you can achieve a realistic sense of depth and dimension.

Setting Up Your Drawing

To begin drawing in two-point perspective, follow these steps:

1. Define the Horizon Line: Set the horizon line at the desired height and position in your drawing. Remember that the horizon line represents the viewer’s eye level.

2. Position the Vanishing Points: Place two vanishing points on the horizon line. These points should be spaced apart and not symmetrically aligned. This creates a more natural and dynamic perspective.

3. Draw Orthogonal Lines: From each vanishing point, draw orthogonal lines that extend to the edges of your drawing. These lines will guide the placement of objects and determine their sizes and positions.

Drawing Objects in Two-Point Perspective

Once you have established the perspective grid, you can start drawing objects in two-point perspective. Here are some tips to help you:

1. Begin with Basic Shapes: Start by drawing simple shapes within the perspective grid, such as cubes or rectangular prisms. Use the orthogonal lines to guide the placement of the shapes and ensure that they align with the perspective.

2. Connect the Corners: Connect the corners of your shapes using orthogonal lines. These lines should converge towards the respective vanishing points, creating the illusion of depth and space.

3. Add Details and Refine: Once you have the basic structure of your objects, add details and refine the shapes. Pay attention to the perspective lines and ensure they remain consistent throughout the drawing.

Practicing two-point perspective drawing and experimenting with different objects and angles will enhance your ability to create realistic and dynamic artwork.

An example of a simple three point perspective drawing
An example of a simple three-point perspective drawing (courtesy of mammothmemory.net)

Three-Point Perspective

In three-point perspective, there are a pair of vanishing points on the horizon line and an additional vanishing point either above or below the horizon line. The technique is typically used when drawing objects that are tilted or foreshortened.

You can create dramatic compositions by highlighting the height or depth of your subjects and showing objects or scenes from extreme angles. This creates a sense of heightened drama from a unique point of view.

Setting Up Three-Point Perspective

To start drawing in three-point perspective, follow these steps:

1. Establish the Horizon Line: Determine the height and position of the horizon line in your drawing. Consider the desired composition and the effect you want to achieve.

2. Position the Vanishing Points: Place two vanishing points on the horizon line, similar to the setup for two-point perspective. Then, decide whether the third vanishing point will be above or below the horizon line, depending on the perspective you want to create.

3. Draw Orthogonal Lines: From each vanishing point, draw orthogonal lines that extend to the edges of your drawing. These lines will guide the placement of objects and determine their sizes and positions.

Drawing Objects in Three-Point Perspective

Once you have established the perspective grid, you can start drawing objects in three-point perspective. Here are some tips to help you:

1. Begin with Geometric Shapes: Draw geometric shapes, such as cubes or rectangular prisms, within the perspective grid. Use the orthogonal lines to guide the placement of the shapes and ensure that they align with the perspective.

2. Connect the Corners: Connect the corners of your shapes using orthogonal lines that converge towards the respective vanishing points. Pay attention to the angles and proportions to create a convincing sense of depth and perspective.

3. Add Details and Refine: Once you have the basic structure of your objects, add details and refine the shapes. Remember to maintain consistency in the perspective lines throughout the drawing. By practicing and experimenting with three-point perspective drawing, you will better understand how to create dynamic and visually engaging artwork.

A Guide to Perspective Drawing: Practical Tips for Perspective Drawing

To further improve your perspective drawing skills, consider the following tips:

1. Study Real-Life Scenes: Observe the world around you and pay attention to how objects, buildings, and landscapes appear in space. This will help you better understand perspective and apply it to your artwork.

2. Use References: Use reference images or objects to study and practice perspective drawing. Drawing from life or using photographs as references will enhance your ability to depict perspective accurately in your artwork.

3. Experiment with Composition: Explore different compositions and viewpoints to add variety and visual interest to your drawings. Play with different angles, heights, and vanishing points to create unique and captivating perspectives.

4. Practice Consistently: Perspective drawing is a skill that improves with practice. Dedicate time to practicing perspective exercises and incorporating perspective elements into your drawings. Consistency will lead to mastery over time.

HOW TO DRAW ANYTHING IN PERSPECTIVE: The Essentials to Dynamic Drawing and Foreshortening

Techniques for Applying Perspective

  • Establish the horizon early when planning the composition
  • Map out orthogonal lines lightly before drawing major objects
  • Use foreshortening on objects closest to the viewer
  • Add details and values to enhance the depth illusion
  • Apply principles consistently throughout the artwork

Avoiding Common Mistakes

  • Inaccurate vanishing points and orthogonal lines
  • Lack of foreshortening on foreground objects
  • Overuse of details in the distance instead of the foreground
  • Objects not scaled correctly based on spatial position
  • Inconsistent perspective resulting in a flat look

Tips for Practicing Perspective Drawing

  • Observe real-life objects and scenes
  • Start simple, like boxes, before complex subjects
  • Use grids and tracing paper to map out the perspective
  • Take photos using perspective principles as references
  • Practice regularly and analyze your work critically


A Guide to Perspective Drawing: Creating Depth with Shading and Lighting

Understanding Light Sources

Lighting plays a crucial role in creating depth in your drawings. You can effectively convey their three-dimensional form by understanding how light interacts with objects. Identify the primary light source in your scene and determine where the light falls on your subjects. Doing this will help you establish the areas of light and shadow, adding depth and volume to your drawings.

Rendering Form with Values

Values refer to the range of tones from light to dark in your drawings. Using various shading techniques, you can give objects a sense of volume and solidity. Pay attention to the light source and use lighter values on areas that are directly hit by light and darker values on areas that are in shadow. This contrast between light and shadow will create the illusion of depth and make your drawings more realistic.

Atmospheric Perspective

Atmospheric perspective is a technique that simulates the way objects appear to fade or become less detailed as they recede into the distance. This effect is caused by the atmosphere’s interference, which scatters light and alters colors. Using lighter values and desaturating colors for distant objects, you can create a sense of depth and distance in your drawings.

Point of View: Generating Dimension in Your Drawings

Creating depth in your drawings is not just about technical skills; it’s also about the artist’s ability to perceive and interpret the world. The power of perspective lies in the artist’s unique vision and their ability to translate it onto paper. Once you grasp the principles of perspective and combine them with your own artistic voice, you will create drawings that capture the physical appearance of your subjects and convey a sense of depth and emotion.

A Guide to Perspective Drawing: Conclusion

Mastering 1-, 2-, and 3-point perspectives is crucial for any artist seeking to create realistic and captivating artwork. By understanding the principles of perspective and practicing different techniques, you can unlock your artistic potential and bring depth and dynamism to your drawings.

Whether you’re drawing landscapes, architectural structures, or everyday objects, the knowledge and application of perspective will elevate your artwork to new heights. So, grab your pencil, set up your perspective grid, and embark on a journey of exploration and creativity through perspective drawing.

In conclusion, the power of perspective is an invaluable tool for artists seeking to create depth in their drawings. You need to learn about perspective, shading, and lighting techniques to make your drawings interesting and captivating. You can then use your style to make your art unique and engaging to others.

So embrace the power of perspective and unlock a new level of creativity in your artistic journey. Happy drawing!

A Guide to Perspective Drawing: FAQs

Q: What are some common mistakes to avoid when drawing depth?

A: One common mistake is neglecting to consider the scale and proportions of objects to each other. Another mistake is excessive detail in the background, which can compete with the main subject and flatten the overall composition. It’s also important to be mindful of the vanishing points and ensure that lines converge correctly to create a realistic sense of depth.

Q: How can I practice perspective drawing?

A: To practice perspective drawing, sketch simple objects and gradually progress to more complex scenes. Experiment with different vanishing points and explore the effects of light and shadow on your subjects. Study the works of master artists who excelled in perspective, and try to replicate their techniques in your drawings. With consistent practice, you will gradually better understand perspective and its impact on your artwork.

Q: Are there any shortcuts to creating depth in drawings?

A: While there are no shortcuts to mastering perspective, some techniques can help you achieve a sense of depth more quickly. For example, overlapping shapes or objects can create a layered effect that adds depth to your composition. You can enhance the illusion of depth in your drawings by gradually reducing detail and desaturating colors as objects recede into the distance.

Q: Can I use perspective techniques in other forms of art?

A: Absolutely! The principles of perspective can be applied to various art forms, including painting, photography, and even digital art. Understanding how lines converge, how light interacts with objects, and how values create volume can greatly improve your artistic skills across different mediums. So whether you’re a painter, photographer, or digital artist, learning perspective will undoubtedly benefit your work.

Q: How can perspective enhance the storytelling aspect of a drawing?

A: Perspective can be a powerful tool for storytelling in drawings. By manipulating the angle, scale, and placement of objects, you can guide the viewer’s eye and create a sense of narrative within your artwork. Using perspective can improve storytelling by emphasizing height and depth to elicit awe or bringing the viewer closer to the subject to create intimacy.

Q: Are there any famous artists known for their exceptional use of perspective?

A: Many renowned artists throughout history have demonstrated exceptional skill in perspective drawing. One such artist is Leonardo da Vinci, whose masterpieces, such as “The Last Supper” and “The Vitruvian Man,” showcase his profound understanding of perspective. Other notable artists include Albrecht Dürer, who was instrumental in popularizing perspective drawing techniques during the Renaissance, and M.C. Escher, whose mind-bending optical illusions pushed the boundaries of perspective.

Best books for learning perspective drawing

Drawing in Perspective: How to Draw in Perspective – a Practical Guide for Artists,
by Vladimir London. ISBN-13: 978-1520389950

  • Drawing in Perspective is a practical guide for artists who want to learn how to draw in perspective correctly. It demystifies the perspective theory and gives practical, easy-to-follow advice on using different types of perspectives in art.


Drawing Perspective Methods for Artists: 85 Methods for Creating Spatial Illusion in Art,
by Peter Boerboom. ISBN-13: 978-1631593031

  • Authors Peter Boerboom and Tim Proetel have arranged, commented on, and, with a guiding hand, intuitively and tangibly presented eighty-five fundamental methods of three-dimensional illustration, offering a refreshing, simple approach to the graphic depiction of three-dimensionality.


The Art of Perspective: The Ultimate Guide for Artists in Every Medium,
by Phil Metzger. ISBN-13: 978-1581808551

  • The Art of Perspective offers simple but powerful techniques for convincingly evoking the illusion of depth and distance, whether it’s a few inches in a still life or miles in a landscape.


Simpifying Perspective: a Step-by-Step Guide for Visual Artists,
by Robert Pastrana. ISBN-13: 978-0415840118

  • Simplifying Perspective is a comprehensive guide specifically tailored for artists who need to learn the ins and outs of one-, two-, and three-point perspective.


Table of Contents
[link-whisper-related-posts]